Diabetic Outlet Store, Diabetic Supplies, Glucose Meters, Glucose Test Strips, Glucose Testing Supplies, Taz
HOW I GOT AN ACCURATE GLUCOSE READING IN 5 SECONDS WITH CARETOUCH
Lately my son has been asking for more food at every meal. He’s only 5 years old, but you can bet he eats as much as a 25 year old. Just when we thought this was only a problem at home his teachers contacted us asking to pack him a bigger lunch. “He eats his lunch and snacks at lunch, so at the afternoon snack time he has nothing left.” What did my wife and I do? We did what every parent would; scheduled a doctor’s appointment. I am sure you can guess what the doctor said. “Let’s get some lab work done.”
The results came back normal after a week. “He’s not hypoglycemic but let’s keep an eye on his glucose levels. I would suggest getting a home glucose monitoring system and test him before and after meals for a few days.”
The choice was easy. We picked Diabetic Outlet’s most popular glucose monitoring system, CareTouch. It’s simple to use, accurate, and contains everything you need to begin testing immediately.
How I got an accurate reading with CareTouch meter in just 5 seconds
Here is the step by step process:
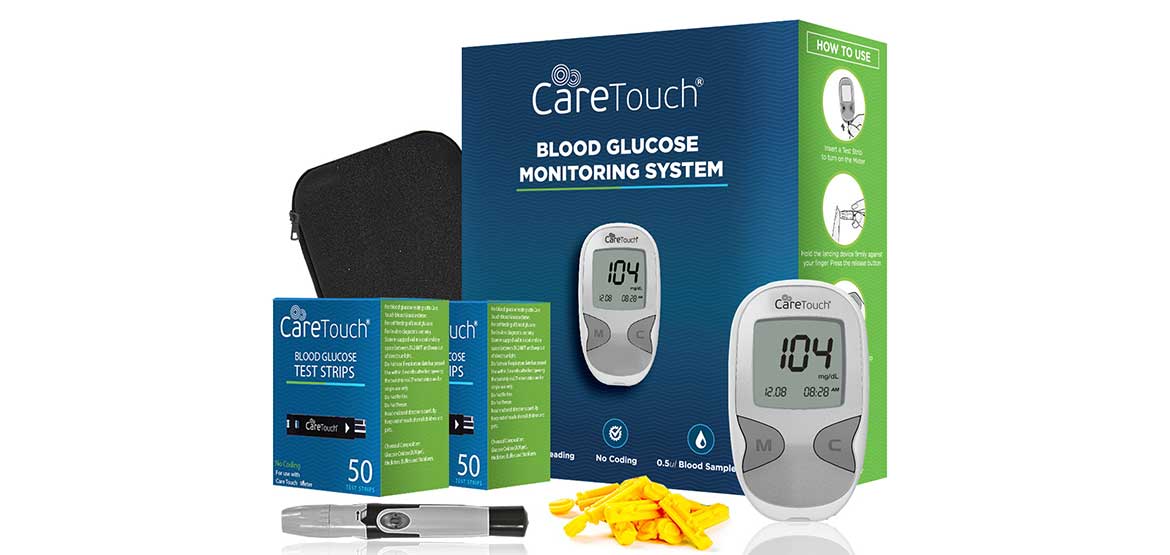
STEP1. Opened the CareTouch Meter Kit box and checked the content. Here is what came in the box
- 1 CareTouch glucose meter
- 100 CareTouch blood glucose test strips
- 1 CareTouch lancing device
- 100 CareTouch lancets
- 3-volt Lithium Batteries (CR2032)
- Compact carrying case
- Instructions for use
STEP 2. Quickly read through the instructions. There is a one-page Quick Reference Manual tucked inside the User Manual. That’s all you need to get started.
STEP 3. Washed my hands, then took one of the CareTouch lancets out. Twisted off the cap and loaded into the CareTouch Lancing Device.
STEP 4. Tested the lancet on my own finger to measure the sting before pricking my 5-year old son’s. To do so I opened one of the CareTouch Alcohol Prep Pads, purchased separately, thoroughly sanitized my skin where I was going to draw blood from and let the alcohol dry. I then adjusted the lancing device to level 5 and pricked my finger. I barely felt a thing. Next I reduced the adjuster to 3 for the little guy.
STEP 5. Opened one of the CareTouch test strips vials and inserted one into the meter until it beeped. (Make sure the three black lines at the end of the strip goes in the slot.)
STEP 6. When the flashing blood symbol appeared I repeated step 4 on my son’s finger and drew a tiny blood sample. I could tell right away he barely felt a thing. In fact he was surprised how smooth it was.
STEP 7. Lastly, I touched the blood drop to the front edge of the strip channel. The blood was seamlessly drawn up into the channel. I did not have to do anything else. Once I made sure the channel was filled, I retracted the finger. Within a few seconds the beeper sounded off and there was his reading.
STEP 8. Discarded the strip, lancet and prep pad, and packed everything away for the next test.
We performed the test again that day as well as twice daily for the next few days. The results were pretty consistent. In case you were wondering if he’s hypoglycemic or not, it turns out he’s not. Just a growing kid eating his parents out of house and home.
CareTouch Products

Amir is interested in learning about diabetes management products. He loves sharing his findings and product know-hows with his readers. He is always on the hunt for the next best glucose monitoring system, CGMs, or any other innovative products.


