Authors, Diabetes Learning Center, Diabetes Management, Glucose Test Strips, Type I Diabetes, Type II Diabetes
Blood Glucose Test Strips – A Step-by-Step Guide for Beginners
Mar
A diabetes diagnosis is not only going to change your daily way of living, but it is also accompanied by an overwhelming amount of information that may seem difficult to navigate. If you have started researching different aspects of diabetes, you have likely noticed the multitude of web pages that can offer you bits and pieces of the complete picture you need.
In this guide, we have collected everything you need to know regarding blood glucose test strips. There is no need to open multiple tabs to find what glucose testing is, how it’s done, and what you must remember for a proper reading because we have compiled it all within this comprehensive guide, so let’s get started.
What is Glucose Testing?
Glucose testing, also commonly known as a blood glucose test, is a way to measure the glucose levels in the body. Glucose is a type of sugar and one of the primary sources of energy in the body, and the hormone insulin is responsible for moving glucose from the bloodstream into the cells.
Health problems can arise when blood glucose levels get too high (hyperglycemia) and too low (hypoglycemia). While an initial blood glucose test is often used to diagnose diseases, such as diabetes, the blood glucose tests that you will do now that you have been diagnosed with diabetes will help monitor your diabetes care plan.
Specifically, those battling diabetes will need to check blood glucose levels daily to ensure that their blood glucose levels are within a healthy range. Diabetes treatment typically involves insulin injections, so if blood glucose levels are not within the normal range, your doctor may want to adjust your insulin dosages to remedy this.
How Glucose Test Strips Work
It seems unusual that what appears to be a strip of plastic with a drop of blood on the end can allow a meter to read your blood glucose levels, but the power of glucose test strips lies in its components that are not so obvious.
The coating of the test strip contains a thin layer of gold cut into a pattern that creates a circuit. On one end of the diabetic test strip is a coating of chemicals that absorb your blood and turn glucose into gluconic acid, which triggers a current in the circuit. This current, which varies in strength by the amount of glucose in the blood, travels into the meter where an algorithm transforms the electrical current reading into a glucose level.
In the past, diabetes test strips and glucose meters may have gotten a bad reputation for not always being accurate. However, current blood glucose meter regulations require results no more than 15% away from the lab tests 95% of the time, and the studies confirming the efficacy of these blood glucose meters must contain at least 350 patients. These regulations help ensure that you can feel more confident in the readings produced by your blood glucose monitor.
A Step-By-Step Guide to Blood Glucose Testing
Given you’re just starting out, you will likely have been recommended an at-home kit to check your glucose levels, compared to the traditional glucose test involving a blood sample that is done at a lab.
The testing kit that you get will include specific instructions for that kit that you must carefully read and follow, but as a general guide to follow, this is the common procedure for most glucose monitoring systems available in the market:
- Wash your hands thoroughly with soap and water to wash away any germs. You will be pricking your skin, so you want to ensure that you don’t accidentally introduce any germs to your body. After washing your hands, be sure to dry them completely.
- Prepare your test strip and meter first. Most meters require that you insert a strip into the meter. Once the strips is properly inserted the meter automatically turns. Some meters may require a code that’s often printed on the test strips vial. In that case follow the instructions in your meter kit to inset the code. Ensuring the proper setup of your meter is crucial before proceeding to the next step.
- Use the lancing device that came with the kit to prick the side of your finger, producing a small amount of blood that you will use for the test. If your kit does not come with a lancing device you find universal one here. You may need to apply some pressure to the skin around the prick to build up some blood. While you can technically prick any part of your finger, it’s often recommend to prick the side so that it isn’t painful to use your finger pad while the wound heals.
- Once you have a good drop of blood, touch the edge of the test strip to the blood.
- Place the strip in the meter and allow it to read your blood glucose level.
- Record the glucose level the meter reads.
- Throw away the lancet and test strip in a proper disposal container.Glucose test strips can only be used once, which is why they should be thrown away once the reading has been taken.Along those same lines, the lancet should only be used once to prevent the introduction of bacteria to the body. For your safety, it is vital to use a new lancet for each blood glucose test.
The above steps only serve as a general guide to help you familiarize with the overall process. The above process does not constitute as the actual testing procedure. To perform an accurate test you must follow the instructions included in your specific glucose monitoring system.
Interpreting Your Blood Glucose Test Results
A blood glucose test can often unpack a whole lot of valuable information about your health status. In order to put your readings in perspective you should know your ranges.
To find out your range you need to consult with your health professional. They will work with you to develop your individualized target ranges that are tailored to your health condition based on a variety of factors including but not limited to:
- Type of diabetes you were diagnosed with and how severe it may be
- Your age and how long you have battled with diabetes
- Pregnancy status for female patients
- The existence of diabetes complications and other health related conditions
- Your lifestyle and overall well-being
- Your family history
- Fasting: before a meal (preprandial plasma glucose): 80–130 mg/dL
- 1-2 hours after beginning of the meal (postprandial plasma glucose)*: Less than 180 mg/dL
Ensuring Accurate Results
There are some tips that you will want to keep in mind to ensure that your readings are accurate.
- Dispose of damaged strips
Due to the delicate nature of the diabetic test strips, with their chemical components and circuit, you will want to only use strips that are fully intact and not damaged to ensure that the chemicals properly convert blood glucose to gluconic acid, and the circuit transports all the generated electricity to the meter for reading. If you notice any damage to your test strips, dispose of them. - Check the expiration date
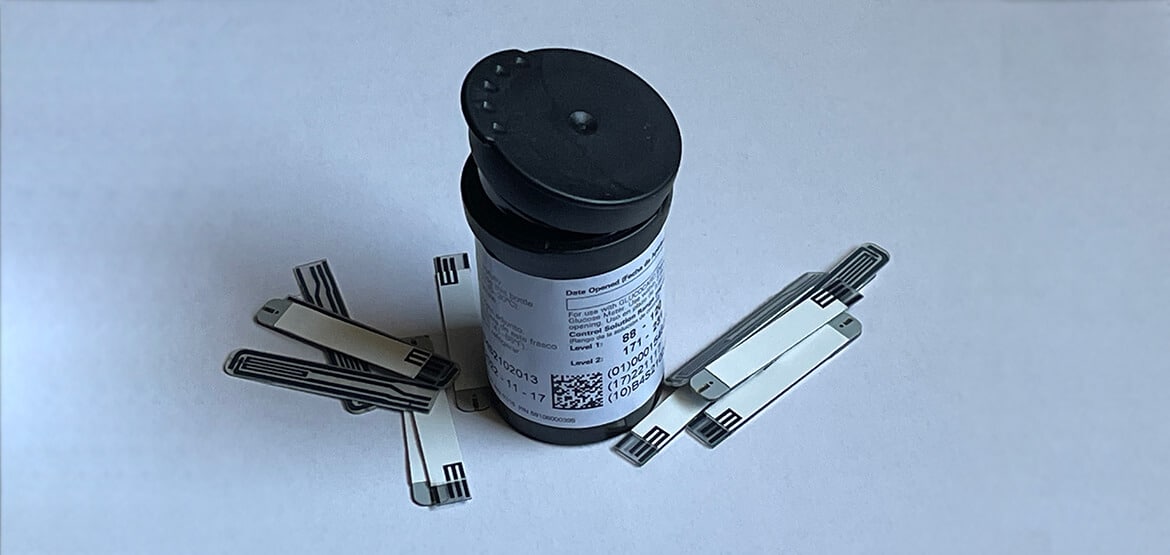
The chemicals that coat one end of the diabetes test strips can become less potent as time goes on, meaning they cannot as efficiently transform glucose to gluconic acid. This means that the reading on the meter won’t be accurate if you use expired test strips. The expiration dates should be clearly printed on the package of glucose test strips, so be sure to look for this. It is essential to remember that the expiration date is only applicable if the package remains sealed and unopened. Once the package has been opened, the glucose test strips are only viable for 3 to 6 months. - Write down the open date:
To ensure that you do not use the test strips past their expiration date, be sure to write down the date the package has been opened. - Ensure proper storage
Proper storage of your test strips play a critical role in getting accurate readings. Because of the chemical and electrical nature of the test strips, you will want to be careful when storing them to ensure that they are not stored in a place that will damage them. To avoid exposure to extreme temperature or humidity you must keep them sealed in their original vial. - Check compatibility
With all the test strips and glucose monitors on the market, you will want to make sure that the test strips you use are the ones meant for your meter; otherwise, they will not work correctly. In particular, the meter may not be able to read the current produced through the circuit because it is not lined up perfectly, or in other cases, the test strip may not fit in the meter at all. - Perform control testing
In addition to the test strips, you also want to make sure that your meter is correctly reading the information provided, and you do this through tests with a control solution. It is important that you carry out this simple check regularly. It’s also recommended to use a control solution every time you open a new vial of test strips. Above all, you must perform a control solution test if you suspect your readings are inaccurate. For precise instructions please check the manual provided in the test strips box. The control solutions also have expiration dates. The solution only lasts for three months after opening, so be sure to replace it when it has expired.
Commons Errors with Glucose Meters
When performing glucose testing on a regular basis you may run into several issues. The more you know about your glucose monitoring system the faster you can troubleshoot the issues. We have a list of common errors with the use of glucose meters and their possible solutions. You should familiarize yourself with these common errors and be one step ahead in case they occur to you.
Ultimately, you want to be the problem-solver. The manufacturers of these glucose monitoring products are often too large to provide individualized troubleshooting. It’s worth spending the time to educate yourself. Learning how to troubleshoot by yourself will save you time and frustration.
KEY TAKEAWAYS
Glucose testing is crucial in ensuring proper management of diabetes. Through blood testing you can unpack valuable information that can help you ensure your diabetes remains in check.
The blood glucose testing has three components, the lancet, the test strip, and the meter. It is crucial that all three of these components are in good condition. The test strips, in particular, have specific requirements in terms of storage and shelf-life that need to be followed to ensure proper readings.
Blood glucose testing may seem overwhelming, but it will soon become second nature with practice. Following the steps listed above and those included with your glucose meter will set you up for success and ensure that the readings from your glucose monitoring system are accurate.

Jessica is a medical writer with an unquenched thirst to discover something new. She believes that medical content should be accessible to everyone and strives to write content that every single person can understand. When Jessica isn’t writing, she can usually be found reading a book with a dog cuddled in her lap.
